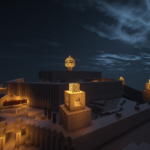
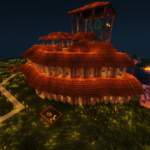
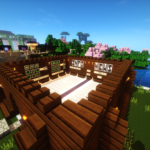
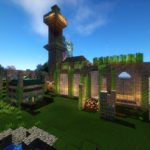
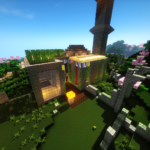
1.13.2

Hello! Long time no see. It’s been a while since I’ve bothered to update this blog, but I figured with the last major update, it was time.

The server is no longer modded, at least with Forge. It’s running Spigot now, which means you can connect with a vanilla client and enjoy some extra benefits. So don’t worry about any of that shit concerning the Twitch launcher below; you can just launch Minecraft and play!


If you’re whitelisted, of course.

1.11.2 and Twitch Update

So, first of all, we updated to 1.11.2, which puts us on the bleeding edge of obsolete. 1.12.1 is PROBABLY going to happen much sooner than 1.11.2 did after 1.10.2, but who knows. Don’t worry about that, just let me know if you run into any weird shit in your builds or bases and I will help you fix it. Everything should be pretty OK though.

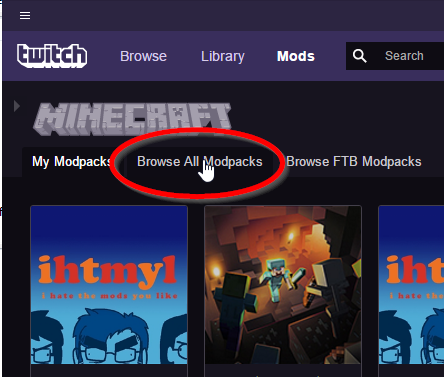
In other news, Twitch updated the launcher again and changed their interface, so here’s how to navigate to get to where it matters:

Click ‘Mods’ in the top area of the launcher window:

Then click ‘Minecraft’:

… and that will bring you to your MC Modpacks. It’s pretty stupid, but it’s still way easier to manage a modpack than it was with Technic, so whatever. If you need to add IHTMYL, click ‘Browse All Modpacks’ and search for it.

Migrating to Curse & Twitch Launcher

IHTMYL is leaving the Technic Platform for Curse. This means that from now on, you’ll need to use the Twitch App to play. Here’s what you need to do to install the pack:

  • Have Minecraft installed. Probably taken care of already, but who knows.
  • Get the Twitch App here: https://app.twitch.tv/download
  • In the Twitch app, Minecraft should be available in the left sidebar. Click to go there and then click ‘Browse All Modpacks’.
  • Search for ‘IHTMYL’.
  • Click ‘Install’.

Once you’ve installed the modpack, you can just run it from the Twitch launcher. You’ll be notified of updates automatically from then on.

For reference, you can find the modpack’s CurseForge page here: https://minecraft.curseforge.com/projects/ihtmyl

New Default Options and Resource Pack

I’ve added a mod to sort out the default options for the modpack. The benefit of it being a mod is that it only triggers once and then leaves you alone, so you can set the options to whatever you want and subsequent updates won’t change that.

If you want the options and have run the pack before, I recommend resetting the pack via the technic launcher. Alternatively, go into the modpack’s folder and delete options.txt, optionsof.txt, and servers.dat.

Additionally, I’ve added a resource pack to the modpack itself that I highly recommend using. It’s called ItemBound, and it adds item camouflage for various things if you’re using OptiFine, which is now also included in the pack by default (again). Keep the resource pack at the top of the list. If you use the default options, it goes there automatically. Server resource packs were causing connection issues, so this is the best solution.

Of course, if you feel that you must, you can delete OptiFine. I know it causes performance issues for some.

Mods Mods Mods

Time for mods! This time we’re entering a brave new (?) world of Forge only, no Spigot, and maybe Sponge later.

That means you need the modpack to play now.

Here’s a full mod list with little descriptions. I tried to maintain the plugin functionality we already had wherever I could.

  • Bagginses – Backpacks with 2 Tiers, also a Void Bag for deleting items.
  • Baubles – Equippable accessory system.
  • Chest Transporter – Move chests and storage drawers.
  • CraftTweaker – Custom recipe system
  • Disenchanter – Remove enchantments
  • Fortune Ores – Ore blocks drop multiple chunks, which smelt into 1 ingot normally. Get more with the Fortune enchantment.
  • Furnus – Adds an upgradable furnace and pulverizer. They both use coal.
  • Hammerz – Adds hammers which mine in a 3×3 square. Perfect for tunnelling.
  • Inventory Tweaks – Sort inventory, etc. An old standby.
  • Iron Chests – Tiered chests with higher capacities. Another old standby.
  • Just Enough Items – Look up item recipes and uses.
  • Just Enough Resources – Adds functionality to JEI to let you see loot tables and mob drops.
  • Just Jetpacks – Redstone powered (as in they literally consume redstone) jetpacks. Don’t actually USE stone or wooden ones, they explode.
  • Lemon’s Simple Teleporters – Teleporters that use eyes of ender as their main ingredient.
  • Mine Menu – Radial customizable menu.
  • More Anvils – Gold and Diamond anvils which have a higher EXP cost cap in case you have to repair a tool you’ve had forever.
  • More Overlays – Light level and chunk boundary overlays.
  • Multi-Storage – More storage options like junk drawers and camoflaged storage boxes.
  • OptiFine – Performance tweaks and MCPatcher functionality.
  • Quark – A bunch of tweaks meant to augment the vanilla experience.
  • Reliquary – Powerful, helpful accessories that are expensive but pay off.
  • Schematica – In-game schematic viewer, allows you to build from 3D blueprints should you so desire.
  • Simple Dimensions – Dimension manager, currently used for DUNGEON WORLD.
  • Simple Magnets – Adds a magnet item and magnet ring that pull items to you. You can equip the ring as a bauble.
  • Soul Shards – The Old Ways – DIY mob spawners.
  • Storage Drawers – Barrel equivalents with different capacities. They also look nice.
  • Thut’s Elevators – Actual working elevators.
  • VeinMiner – Mine multiple blocks at once. Sneak to activate.
  • WAILA – Tooltips for what you’re pointing at.
  • WorldEditCUI (WorldEdit pending) – Client UI for WorldEdit. WorldEdit isn’t actually… added yet. But it will be!
  • Xaero’s Minimap – It’s a minimap.

Cosmetic Items

Recently you may have noticed that the client automatically downloads a resource pack from the server upon connecting (or at least it did it once or twice). That’s a server-specific resource pack I’m putting together, based on one called Blue Haven – Items. The pack enables some cosmetic options for items and equipment. It also adds some custom loot.

It’s all based on item names. You can change the name of any item you’re currently holding by using the /rename command. The command can handle spaces, so to change the name of your Diamond Axe to ‘Diamond Chainsaw,’ the command would be ‘/rename Diamond Chainsaw‘.

This applies to a lot of items. Everything you can do by default is documented here:

BH Items: Armor Guide

BH Items: Weapons Guide

BH Items: Tools Guide

BH Items: Food Guide

BH Items: Mob Drops Guide

BH Items: Fish Guide


I’ve added some other stuff of my own. You can, as mentioned, rename Iron and Diamond axes to ‘Iron Chainsaw’ or ‘Diamond Chainsaw’ respectively to get a chainsaw instead. You can also append ‘Invisible’ to any armor (i.e. Invisible Diamond Chestplate, Invisible Iron Helmet, etc.) to make it not show up for you.

You can also rename your Elytra if you have one to change its appearance when equipped. The options are:

  • Angel Elytra
  • Demon Elytra
  • Dragonfly Elytra
  • Eagle Elytra
  • Golden Beetle Elytra
  • Green Beetle Elytra
  • Purple Beetle Elytra
  • Green Dragon Elytra
  • Red Dragon Elytra
  • Greenwing Macaw Elytra
  • Phoenix Elytra


To make use of any of this, you need to have Optifine installed. The easiest way to get it is by using the Technic Modpack tailored to the server.

WorldEdit

Replacing the walls of tunnels is a drag. So is building that initial cobblestone frame. WorldEdit alleviates some of that. I’ve enabled the most useful commands for survival mode to let you bang out the more tedious stuff more quickly.

Normally WorldEdit is a creative mode tool, but I’ve configured it to use your inventory. There are some limitations to this; it doesn’t seem to like metadata much, so you can place a lot of stone or dirt with it, for example, but not andesite or coarse dirt; in the latter case it will just complain that you don’t have enough stone or dirt. But it’s handy for laying out big areas or, say, replacing the walls of a tunnel or the floor of a room.

If you feel so inclined, grab a blaze rod (that’s the WorldEdit ‘wand’ on the server) and give it a try. Left click a block to define the first corner of your selection, and right click a block to select the second corner. Thanks to the WorldEditCUI mod included in the modpack, you should be able to see your selection.

The following commands are enabled (the double slash is required):

//set <block>  – Sets the selection to the specified block. Uses your inventory.

//replace <block1> <block2> – Replaces the first block specified with the second. Uses your inventory.

//stack <number> – Copies and pastes the current selection over and over in the direction you’re facing the number of times you specify. Good for bridges, roads, and monolithic walls. Uses your inventory.

//thaw <radius> – Melts snow in the specified radius. Doesn’t require a selection.

//deselect – Clears your selection. A good thing to do when you’re done.

Any command that uses your inventory basically works like mining the blocks and replacing them, if it’s replacing anything that isn’t air. The blocks you get will be the normal result of mining them, so for example if you replace a bunch of stone, you’ll get cobble. If you replace grass, you’ll get dirt. If you replace glass, you won’t get anything.

You can’t replace any blocks with air, so you can’t mine for “free”.

Also, anything that is “mined” as a result of an operation will enter your inventory automagically, not be dropped as an item. So if you exceed your inventory space, anything you’d normally get is lost to the ether.

Enjoy, and let me know how it goes.

Build Zone Made Easy

In my introductory posts I brought up the Build Zone a lot. It’s the area of the world map I can guarantee won’t get reset, should the need arise due to mods or whatever. Originally it was envisioned as a 1024 x 1024 area centered on Spawn (for reference: x 111 z 311) but upon looking at the map and playing for a week or so I don’t think 1024 x 1024 is enough area. So I’ve bumped it up to 2048 x 2048 centered on Spawn instead.

To make this easy, you can now see the border of the Build Zone on the map.